
Manual entry allows activity data to be entered for inventory item(s) against a month(s)
Options allow easy filtering, sorting and grouping of the activity data list so you can view the required inventory item(s)
To find this feature, on the menu bar, select Data Collection > Manual Entry > Manual entry tab.
Table of Contents
Overview of the page
When the page is first displayed, the Data spreader tab is selected. Click on the Manual entry tab:
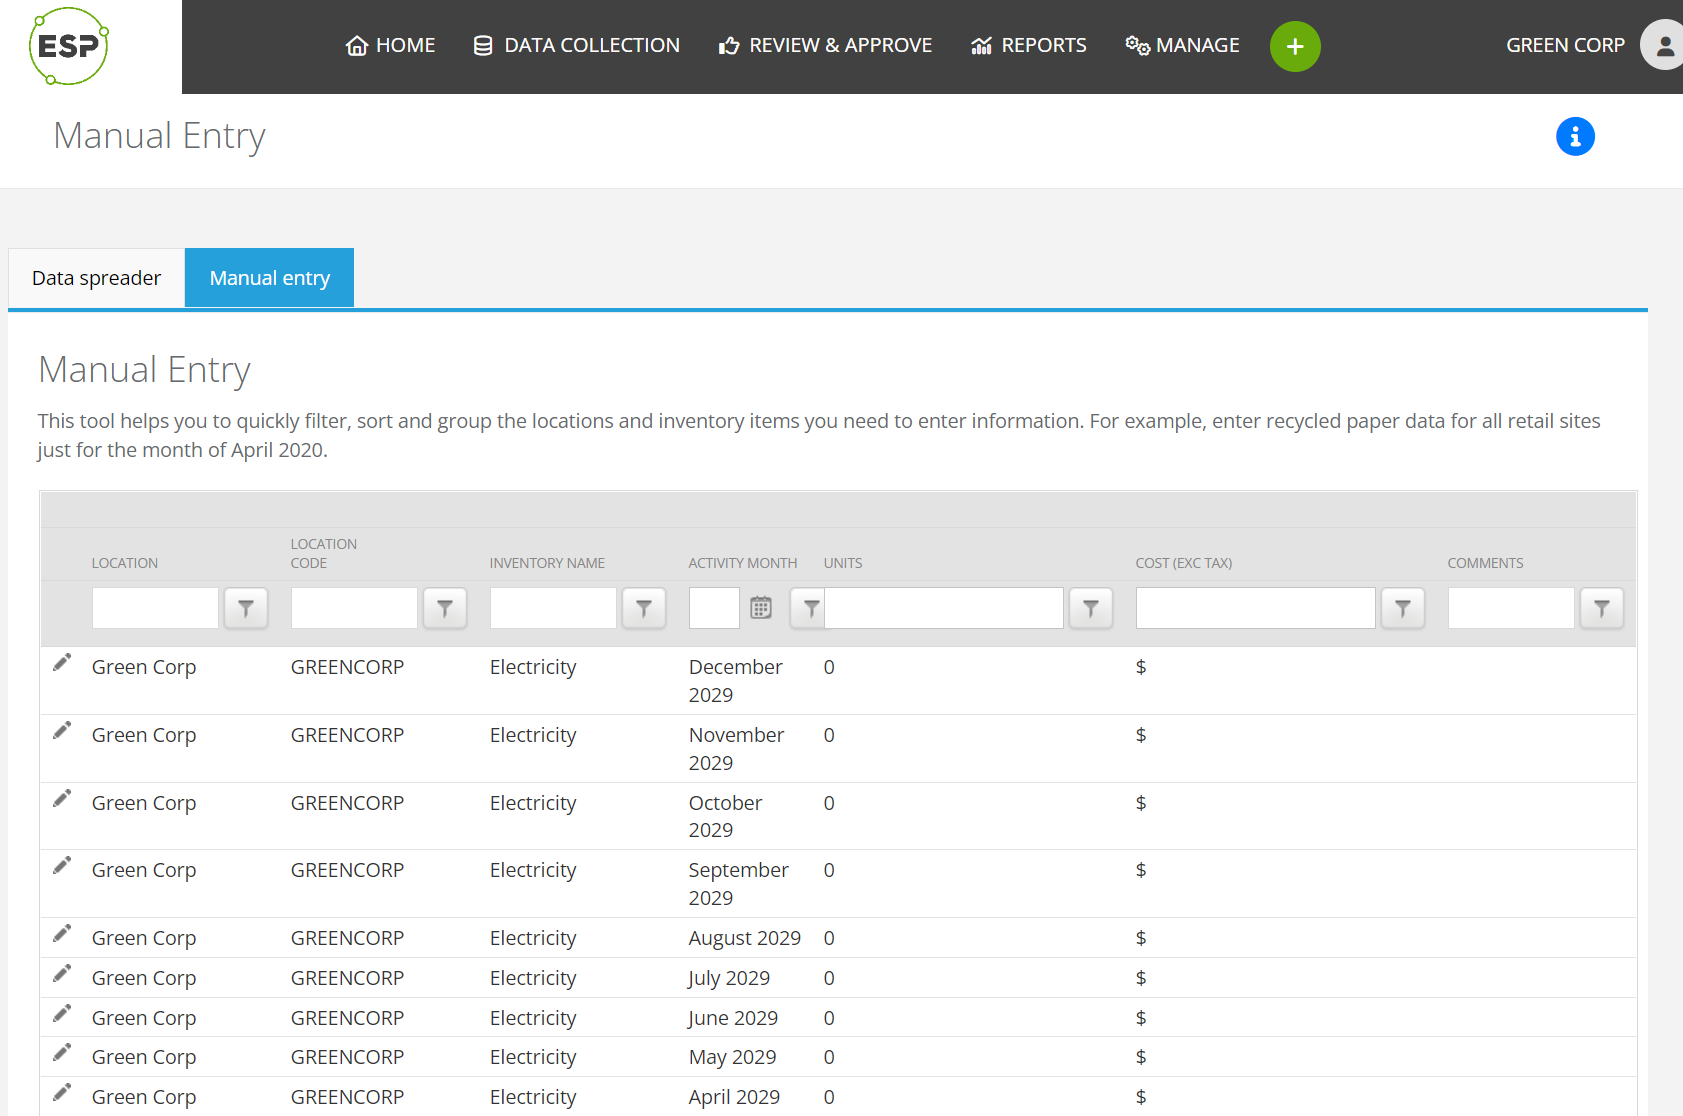
- Column headers, e.g., Locations:
- Click on a column header to sort the column alphabetically (A-Z) or numerically (1,2,3...).
- Click again to reverse the sort order.
- Click again to remove the sort order.

- Filter boxes:
- Enter the value you want to filter by in the box.
- Click the filter icon to the right.
- Select a filtering option, e.g., Contains.
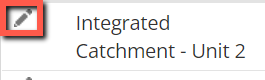
- Edit button (Pencil icon):
- Click to edit the activity data (units, cost) and comments on that row.
A tick and X icon appear. - To save the edit, click on the tick.
- To cancel the edit, click on the X.
- Click to edit the activity data (units, cost) and comments on that row.

- Column footers:
- Column totals are automatically calculated and displayed in the footers.

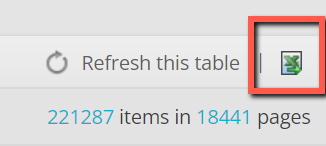
- Grid footer:
- Pagination options allow navigation where there is more than one page of information.
- Page size allows an increase or decrease of the number of rows displayed on each page.
- The Excel icon is an export option to output the information to an Excel format sheet.
Entering data for a location
To enter data for all the inventory items(s) belonging to a particular location:
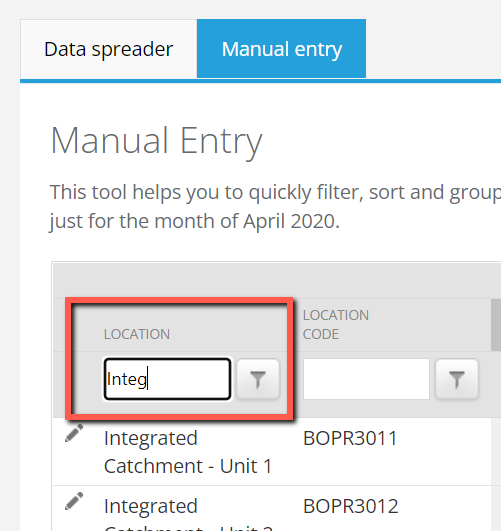
- In the Location filter box:
- Enter the value you want to filter by in the box.
- Click the filter icon to the right.
- Select filtering option, e.g., Contains.
- All inventory item(s) belonging to that location are displayed:

- Click on the Inventory Name column header to sort the results A-Z (or Z-A by clicking again).
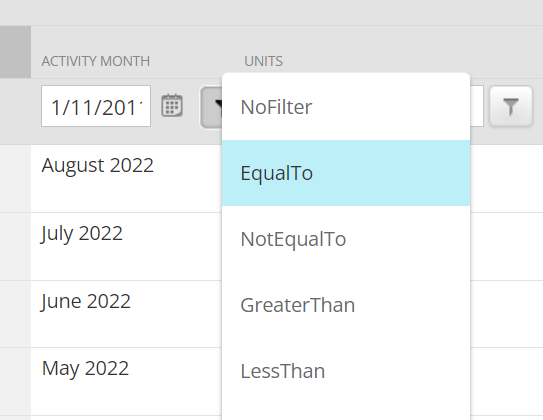
- To enter data for a particular month, in the Activity Month filter box:
- Enter dd/mm/yyyy
- Select EqualTo from the filter options.
- All inventory item(s) for the selected location and dates will be displayed.
- Click the Edit button (Pencil icon):
- A tick and X icon appear.
- To save the edit, click on the tick.
- To cancel the edit, click on the X.
Entering data for specific inventory
To enter data for a particular inventory item across all locations:
- In the Inventory Name filter box:
- Enter the value you want to filter by in the box.
- Click the button to the right.
- Select filtering option, e.g., Contains.
- All inventory items(s) regardless of location are displayed:

- To enter data for a particular month, in the Activity Month filter box:
- Enter dd/mm/yyyy
- Select EqualTo from the filter options.
- All inventory item(s) for the selected names and dates will be displayed.
- Click the Edit button (Pencil icon):
- A tick and X icon appear.
- To save the edit, click on the tick.
- To cancel the edit, click on the X.
Good to know
- We recommend using this feature as a last resort to add activity data as it is does not provide a clear audit trail.
To maintain a full audit trail, it is best to use File Uploads. - It is best practice to write a detailed comment on the activity data row that is being edited to provide a reason for the addition or update.